|
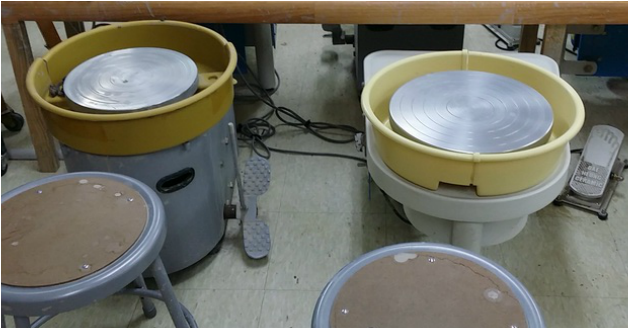
This week I began working on the wheel to create my wheel thrown pots using what I learned on the last class the week before. Although I was just glad to be working on the wheel at first, I later found that it was actually much harder than I expected. In fact, getting the hang of centering took me a whole class and even then, I still wasn't good at it. Unlike the way that Mrs.Lopez had demonstrated to us with ease, it was very difficult to make the clay maintain a shape on the wheel without falling apart in the middle. Because I failed so much this week, I only made one successful cup in total. Thus, I must work harder next week to make at least one more mug cup. Also, I found it very tiresome to always clean up again after failed attempts. The final clean-ups take about 10minutes because there is so many things to wash! Other than this, I feel like this unit will be extremely fun. 
0 Comments
 This week I made the finishing touches to my world culture pot by carving out a part of the backside of my clock frame to make it thin enough for the clock pieces to later on fit in there. Also, because it started to crack a little in some of the thinner areas, I had to use slip to cover these parts up. After having finished all this, I was also able to start wheel throwing this week. And although I only had about half a class to learn about this yet, I feel like the wheel throwing unit will be very exciting and am elated that I will be able to work on it for the next few weeks.
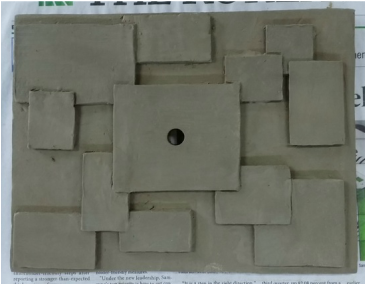
During this week, I was able to use the size measurements I laid out last week to prepare all the pieces to the design of my clock using clay slabs. I first had to roll out all the slabs using the slab roller to a reasonable length. Then, I used the biggest slab to create the base frame for my clock. Using the slabs I had left, I then used a ruler to cut out all the rectangles to the sizes I needed. Next week I plan to actually start creating the overlapping designs and actually placing them onto the frame. 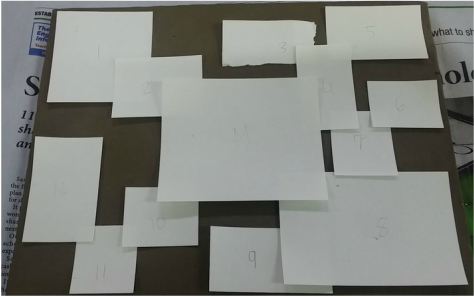  This week I created the design for my world culture pot; I decided that instead of making a pot or cup like originally planned, I would make an actual working clock! Using this design that I came up with, I also worked to create the actual size templates out of paper so that I could have all the size measurements laid out before I actually started to make the pot with clay. Next week I plan to actually start to make the clay pieces.
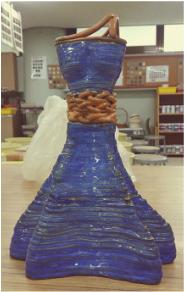
I was finally able to make a palm tree that stood with realistic looking leaves and intricate texture to go along with it! Though it took me several tries over three days, I was finally able to figure out the right proportion of clay to use and angle to attach the leaves so that they would stick and not collapse. Also, this week, I got my coil pot back from the final glaze firing. Though I was very excited to see that it actually looked like a dress. The glaze colors didn’t turn out as bright and smooth as I had imagined which was just a slight bit disappointing.
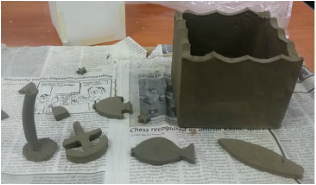
and right. This took me awhile to get the hang of as I found it very hard to carve out parts from the slabs to create my textures. However, I did enjoy using various different textures to make my pot interesting. For example, I would use the fish cut outs I had made the week before to put onto my slab but carve out from the slab the air bubbles that these fish breathed out. Also, I started to make my palm tree to put at the top of my slab pot but found it very hard to make one with realistic leaves that weren’t too heavy for the root of the tree. This week was the first week that we got back from winter break but we found ourselves very busy with a lot of projects that we had started before break but never finished - the world culture pot, the coil pot, as well as our slab pots. Thus, this week I focused on trying to finish the glazing of my coil pot, the dress. In fact, I actually decided to go for the complimentary colors of orange and blue to make my dress look very elegant but also unique. Also, I started to create my slab pot as well.  |